How to use Shopify Buy Buttons with Squarespace

This guide was updated in December 2022
If you’ve built a beautiful website on Squarespace and then realised that a must-have commerce feature is missing, this guide is for you!
If you haven’t signed up for Squarespace yet, you can get 10% off your first subscription of a website or domain by clicking on this link and using the code SFD10 at checkout.
Squarespace is one of the best website building platforms available. You can build a stunning website for your business but if you are selling online, you may become frustrated by the lack of advanced ecommerce features. For example:
Multi-origin shipping
Multiple pick-up and delivery options
Different sales tax (vat) rates per product
The good news is that you can pair many (not all!) of Shopify’s features with Squarespace by using Shopify* Buy Buttons on your Squarespace website.
The Shopify* Starter plan starts at around $5 USD per month. It’s completely free to try this with your Squarespace website. What have you got to lose? Start a free trial of Shopify and follow the steps below.
*If you see an asterisk beside a link, it indicates this is an affiliate link. If you make a purchase, I may receive a small commission but the price you pay will not increase - it may even decrease!
How does it work?
If you have a Squarespace website, and you want to take advantage of Shopify features like “buy now, pay later” services, you must either switch to a competitor, such as Shopify, or integrate a competitor’s commerce features with Squarespace.
If you want to stick with your beautiful, well-designed Squarespace site, then one option is to keep Squarespace for the website design features that it offers, and replace all of Squarespace’s commerce features (their cart, checkout, order emails, shipping options, tax management, inventory and so on) with those of Shopify.
Shopify offer a Starter plan* which isn’t shown on their main pricing page. For around $9 (USD) per month, you can use the core features of Shopify, including their payment options, with your Squarespace website. You’ll be replacing everything in Squarespace commerce with the equivalent feature in Shopify and so the sales workflow will work something like this example:
Add Shopify to Squarespace
With just a few simple steps, you can start selling right away. Create an account in Shopify*, add your product, generate your Buy Button code, and copy and paste it onto a page of your Squarespace website. Your visitors can add multiple items to their shopping cart and enjoy secure checkout, or they can come back later to complete their purchase. You’ll be able to accept additional payment methods and take control of sales tax.
*If you see an asterisk beside a link in this guide, it indicates this is an affiliate link. If you make a purchase, I may receive a small commission but the price you pay will not increase - it may decrease!
The Basics
1. Start a free 3-day trial of Shopify*. When you click the free trial button, you’ll see the form below, asking you for some basic information - your email address, a new password and a name for your store. The name of the store will be used in all the order-related emails so you’ll want it to match your current Squarespace site.

How to start your free trial
2. Navigate to the Products section or follow the prompts to add your first product.
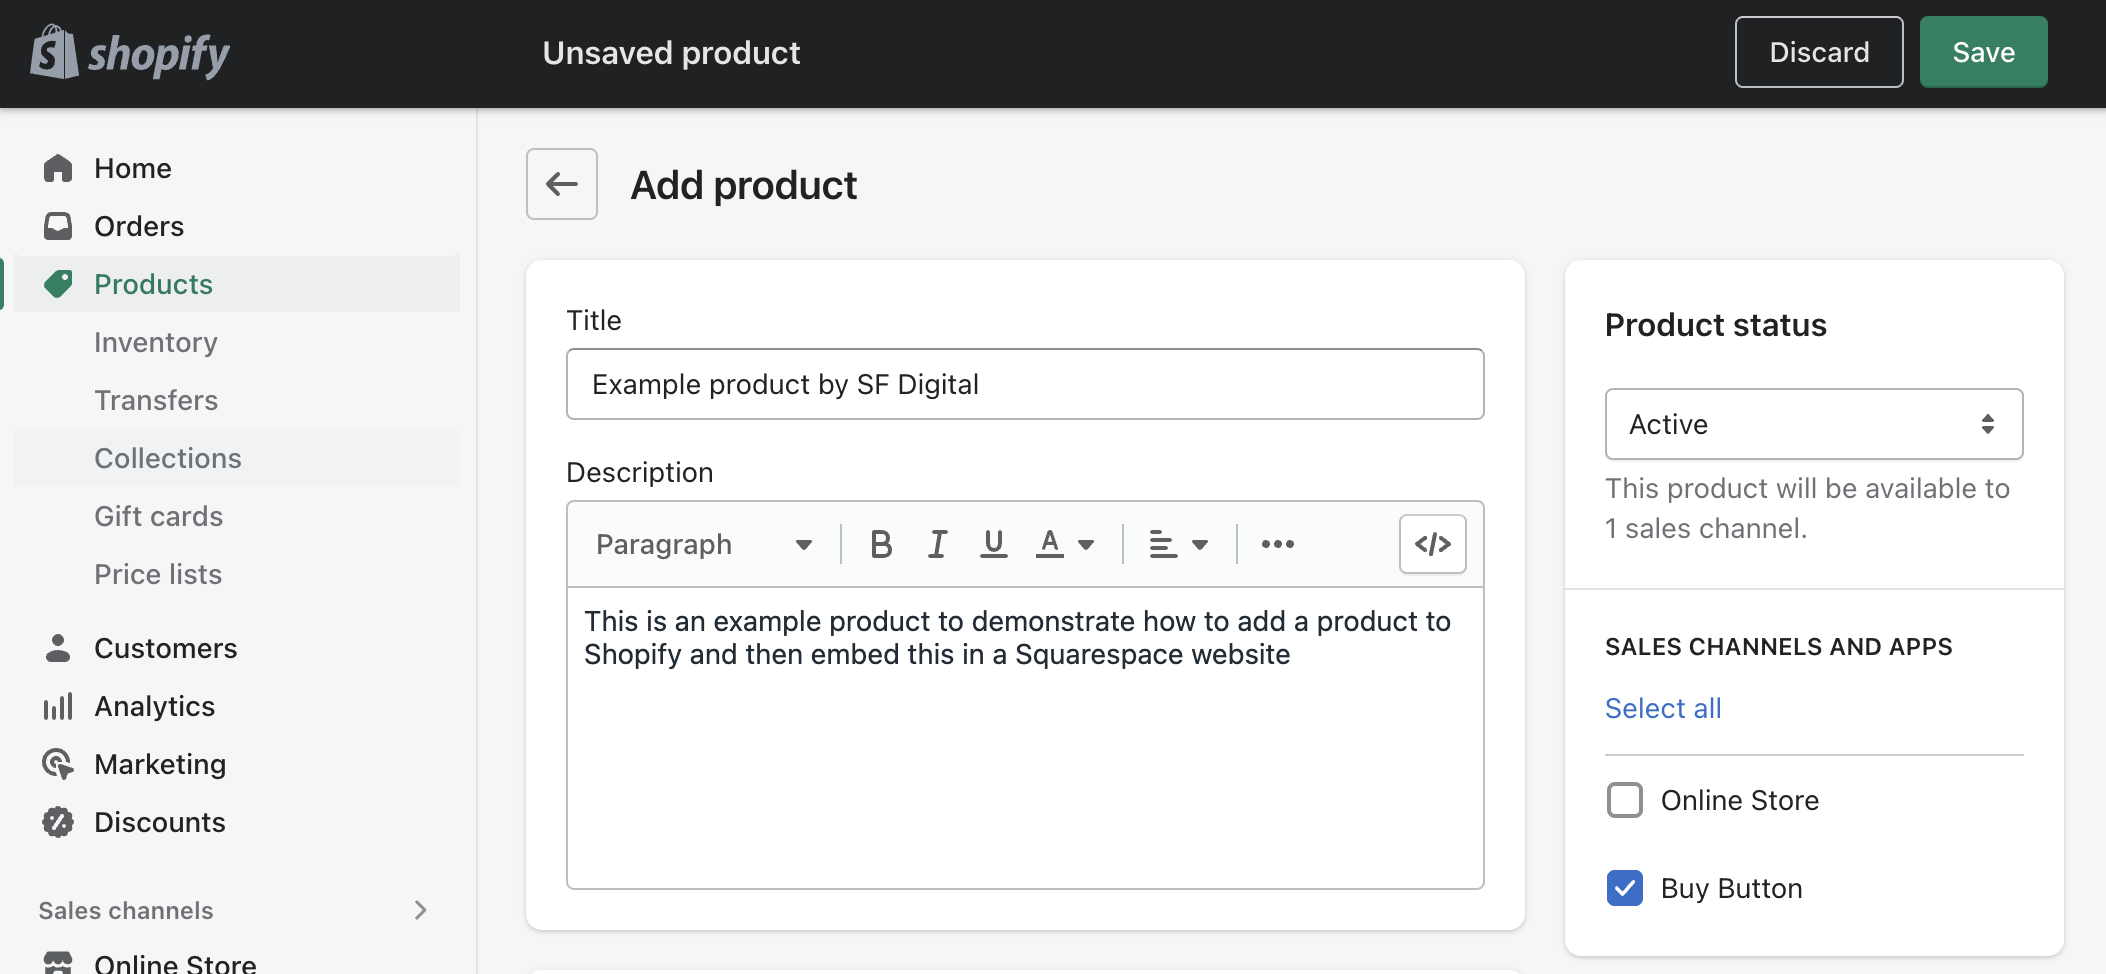
3. Just like in Squarespace, you’ll be prompted for a title, description, image and price. Add the required information and click the Save button in the top-right of the window. Congratulations, you’ve now added your first product to Shopify!


4. In the Shopify navigation (see above) look for the Sales channels section (at the bottom). If you do not see a Buy Button option, click Sales channels and type buy button in the search box that appears.
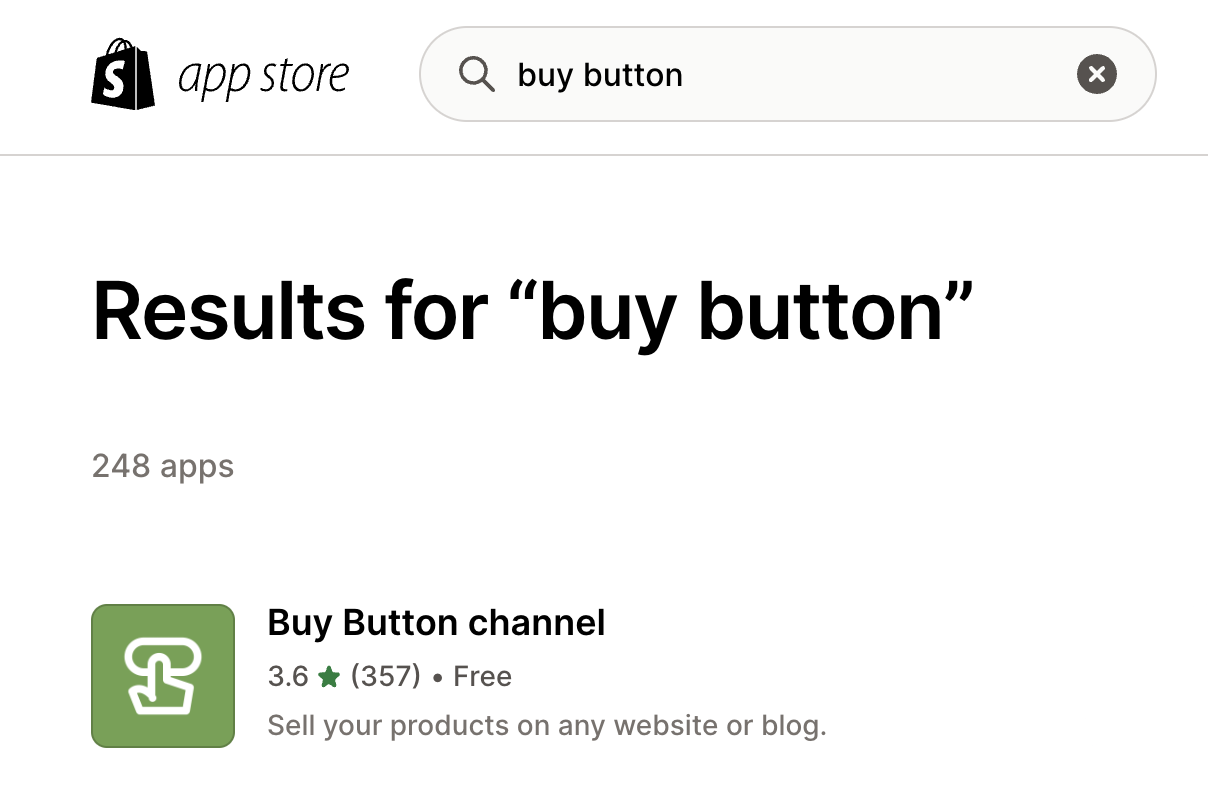
5. Click the Buy Button channel. The correct option has a green icon (see above) and should not be confused with other third-party apps that mention buy buttons.
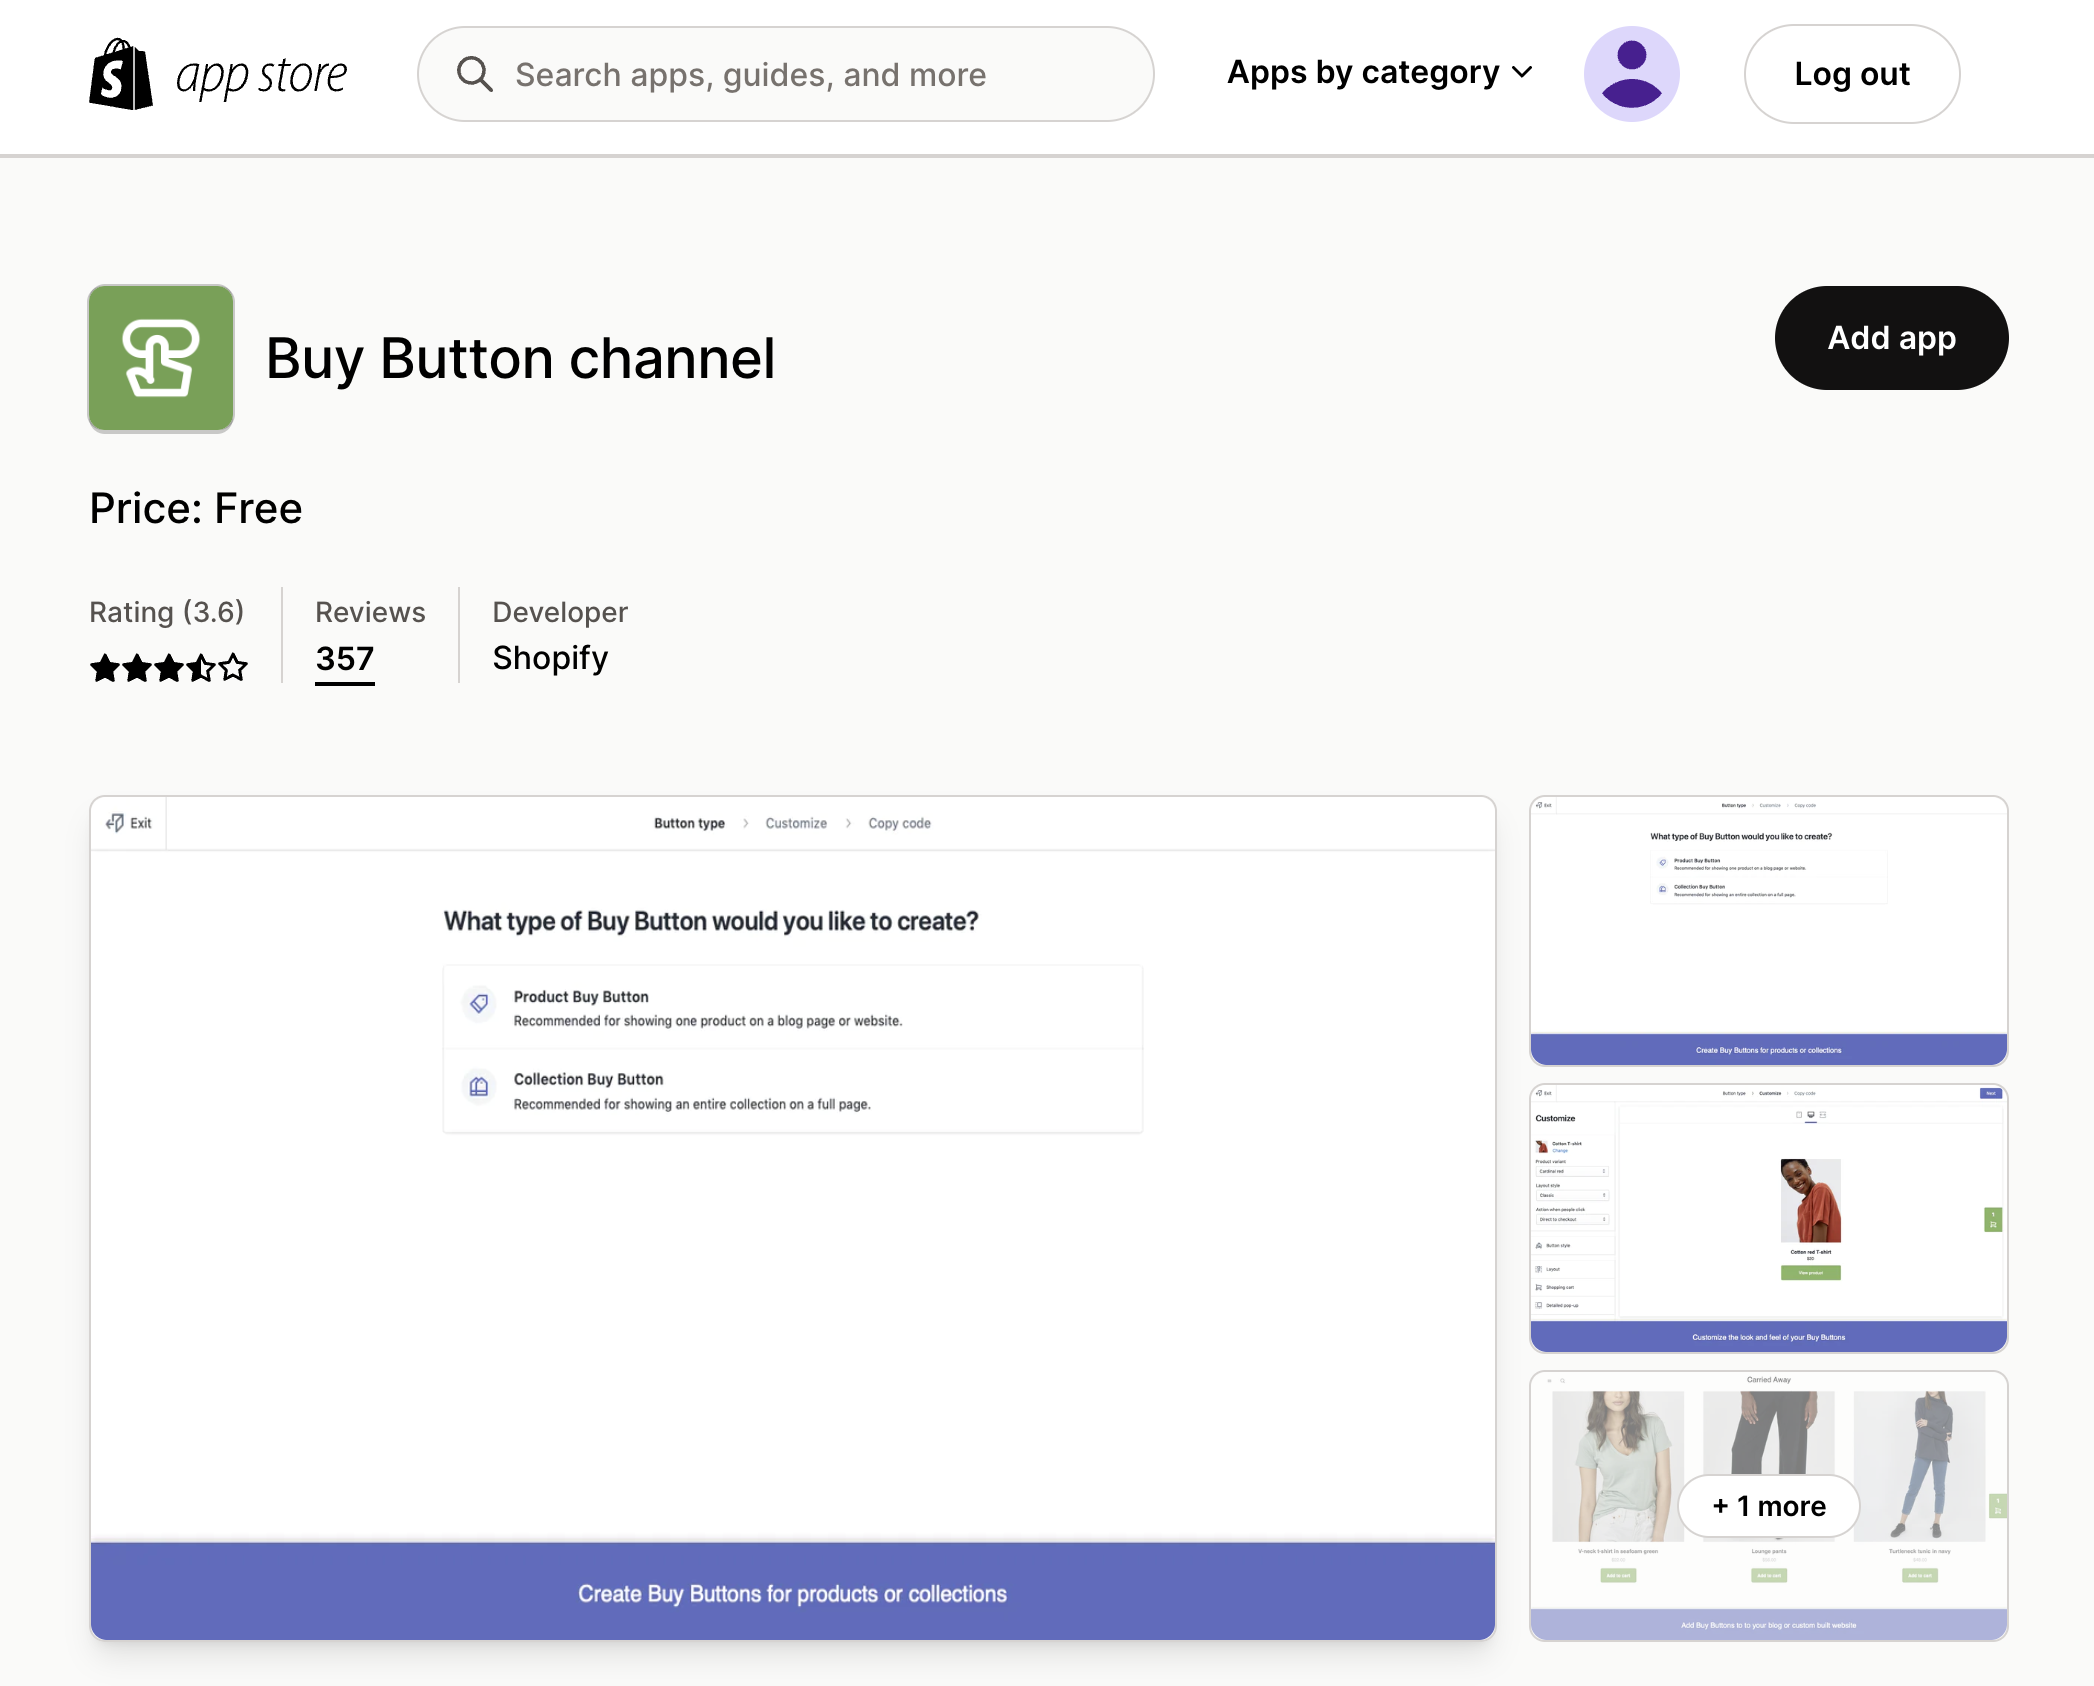
6. Click the Add app button to add the Buy Button channel to Shopify.
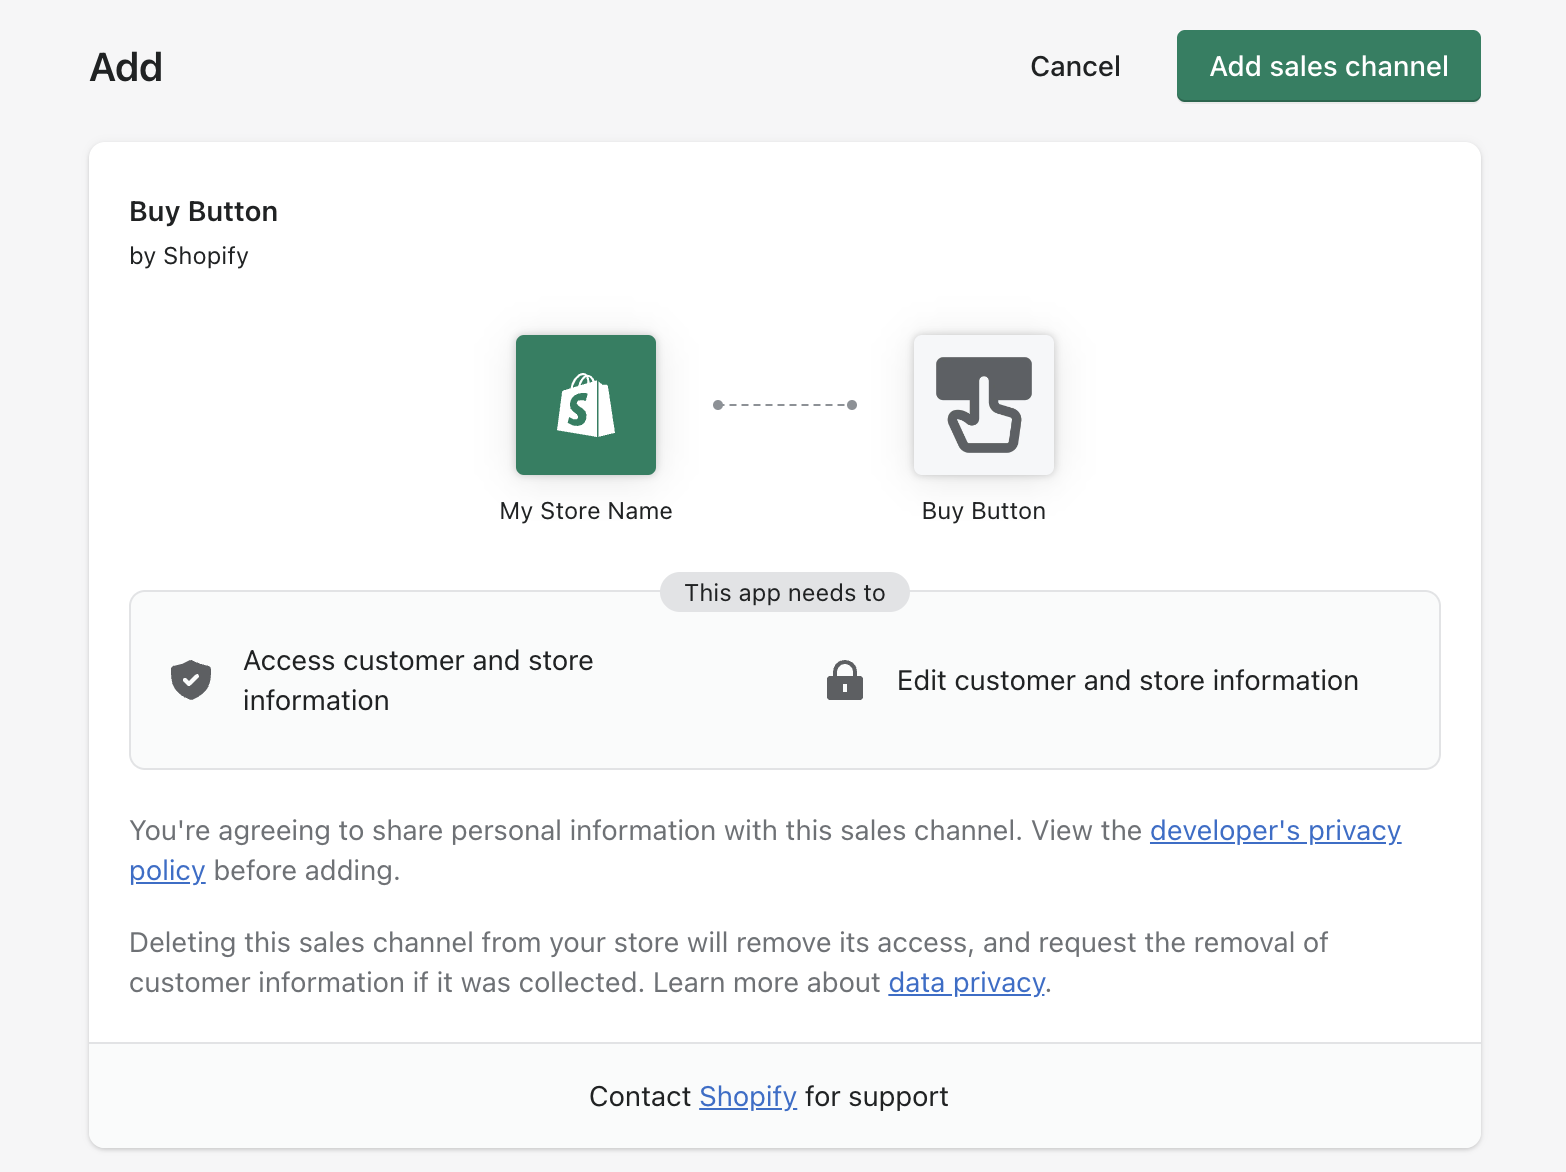
7. Click Add sales channel to agree to the sales channel permissions shown on the page.
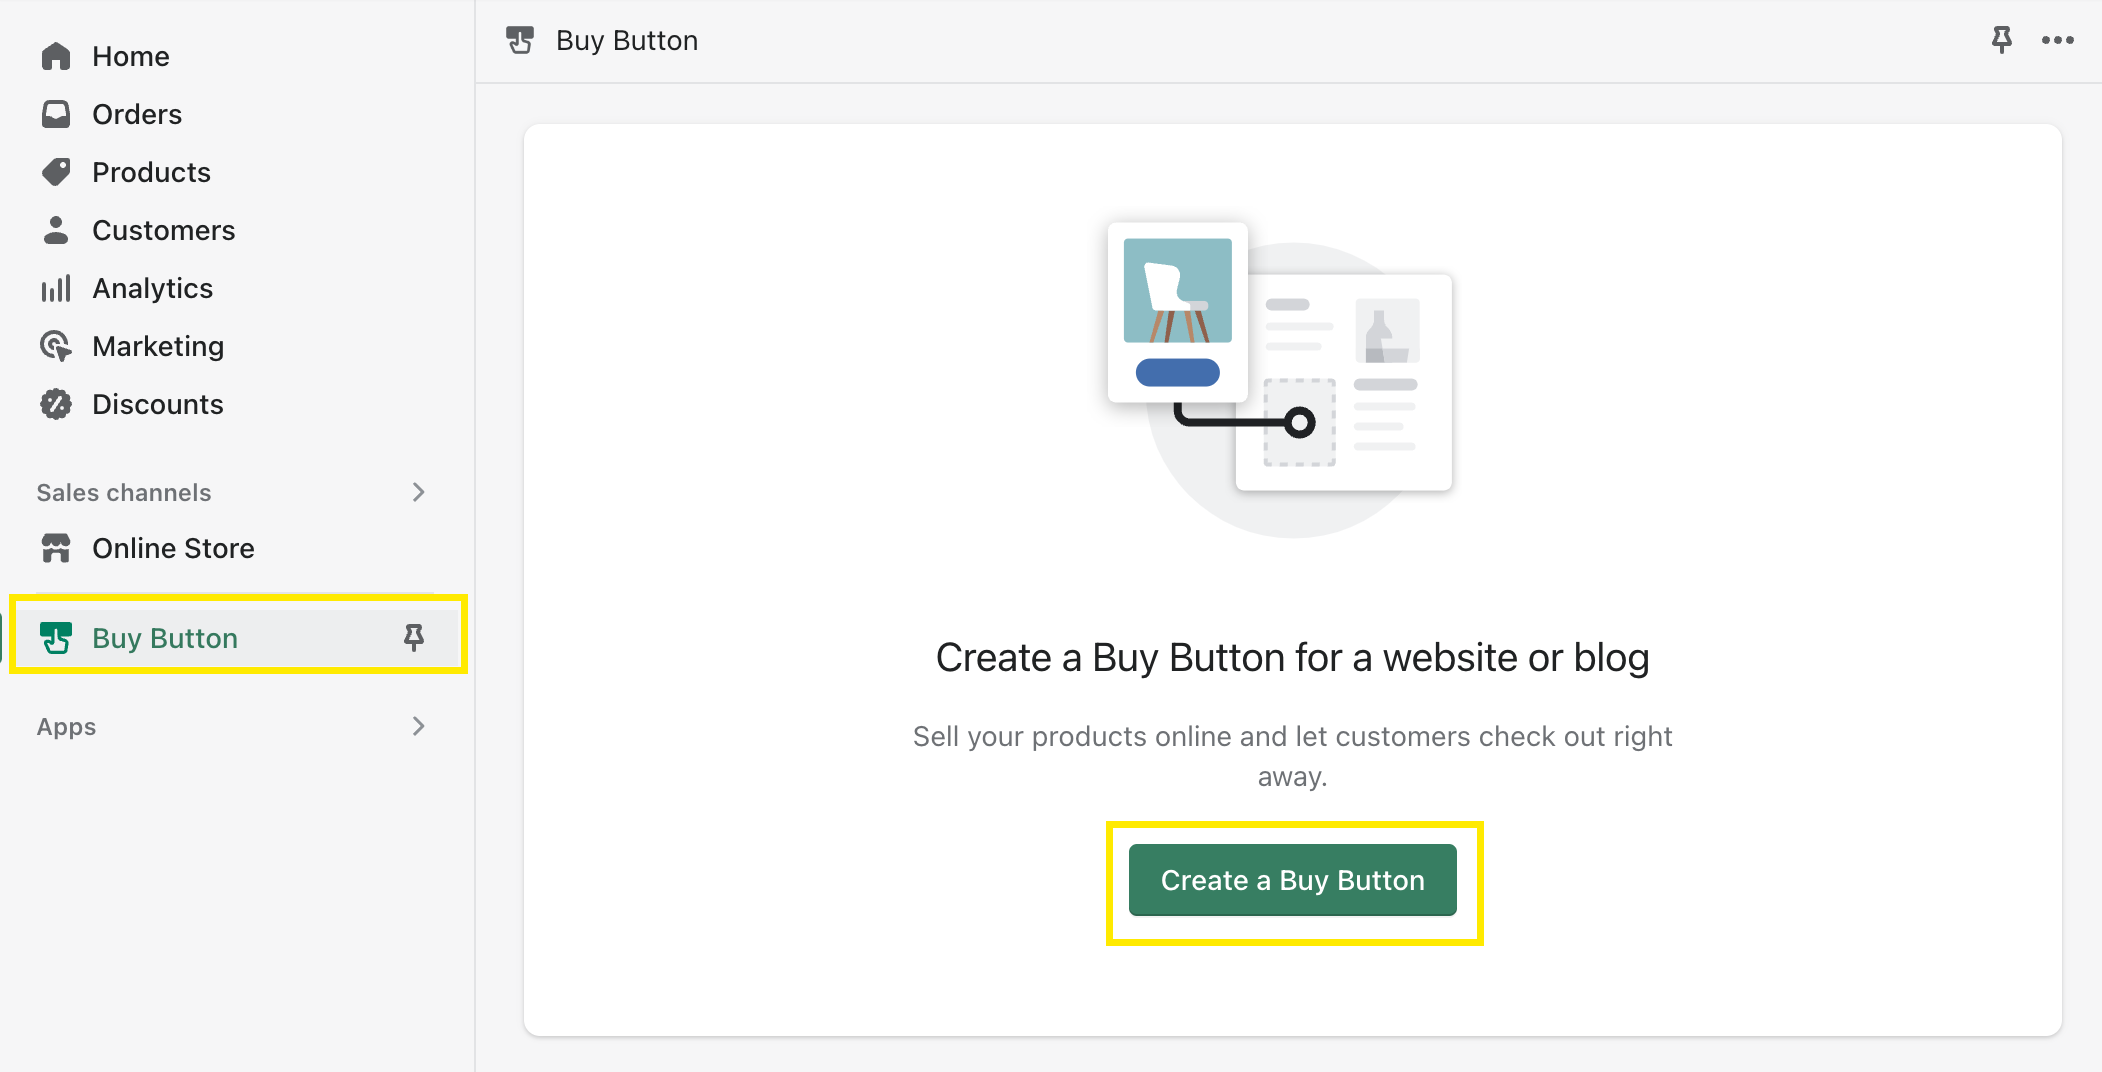
8. After a few seconds, Buy Button will be added to the Sales channels (on the left) and a button will appear entitled Create a Buy Button.
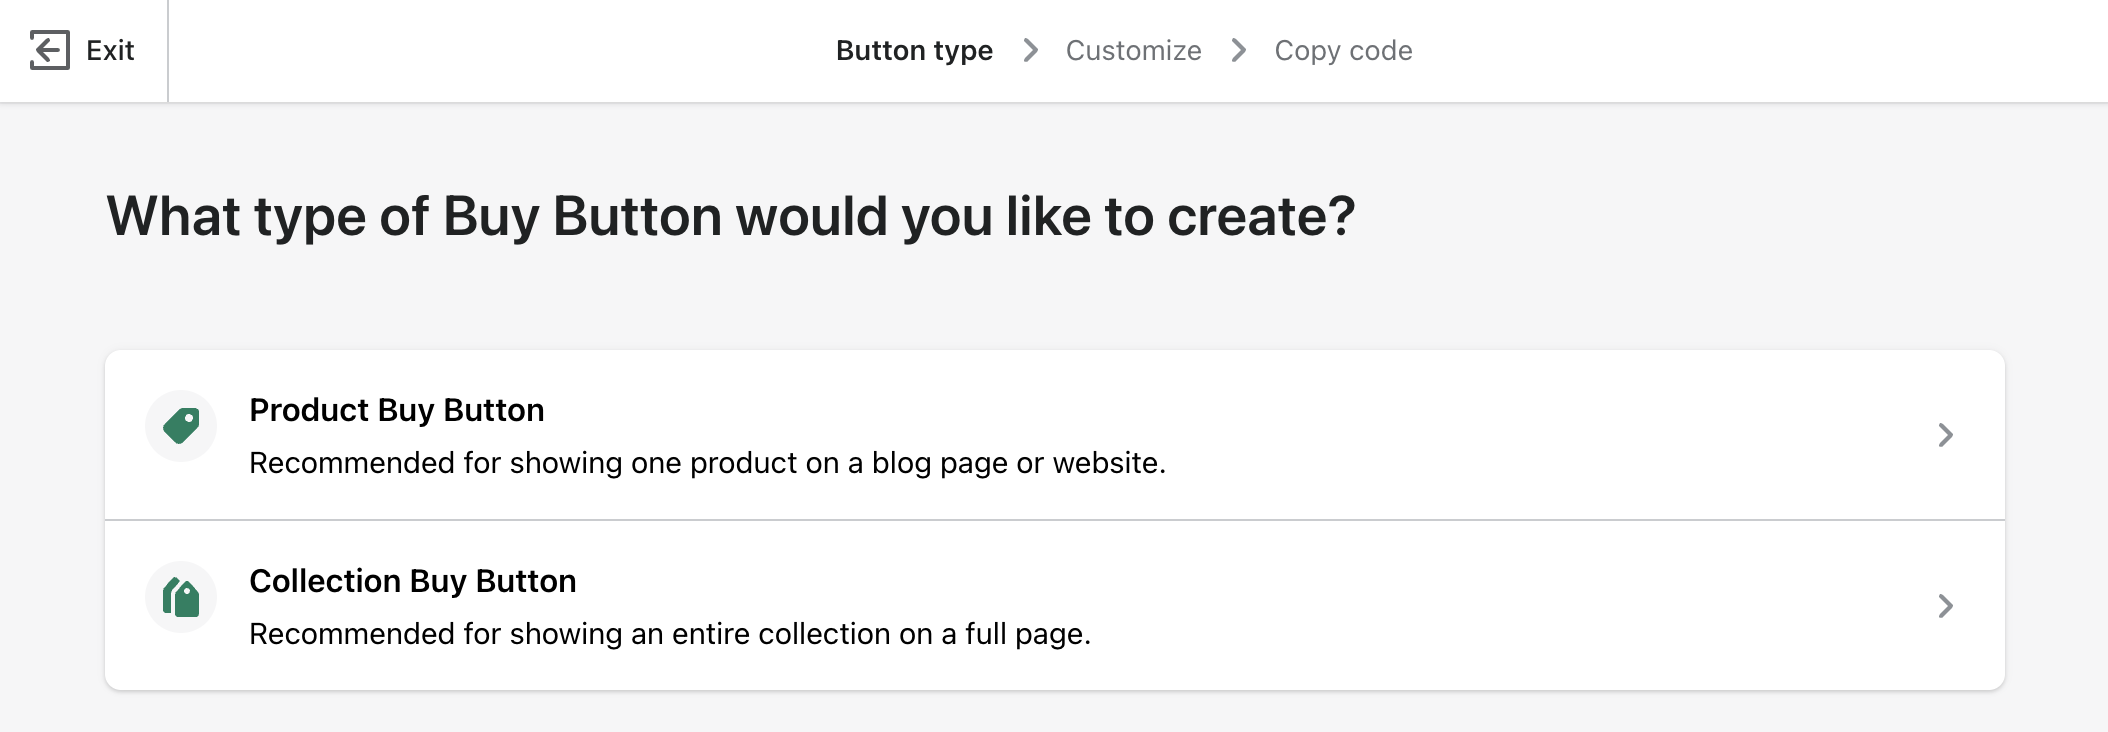
9. Click Create a Buy Button. You’ll be asked what type of Buy Button you want to create. Choose Product Buy Button.
10. A window will appear prompting you to select one of your products. Select your product (by clicking the checkbox on the left) and then click Select.
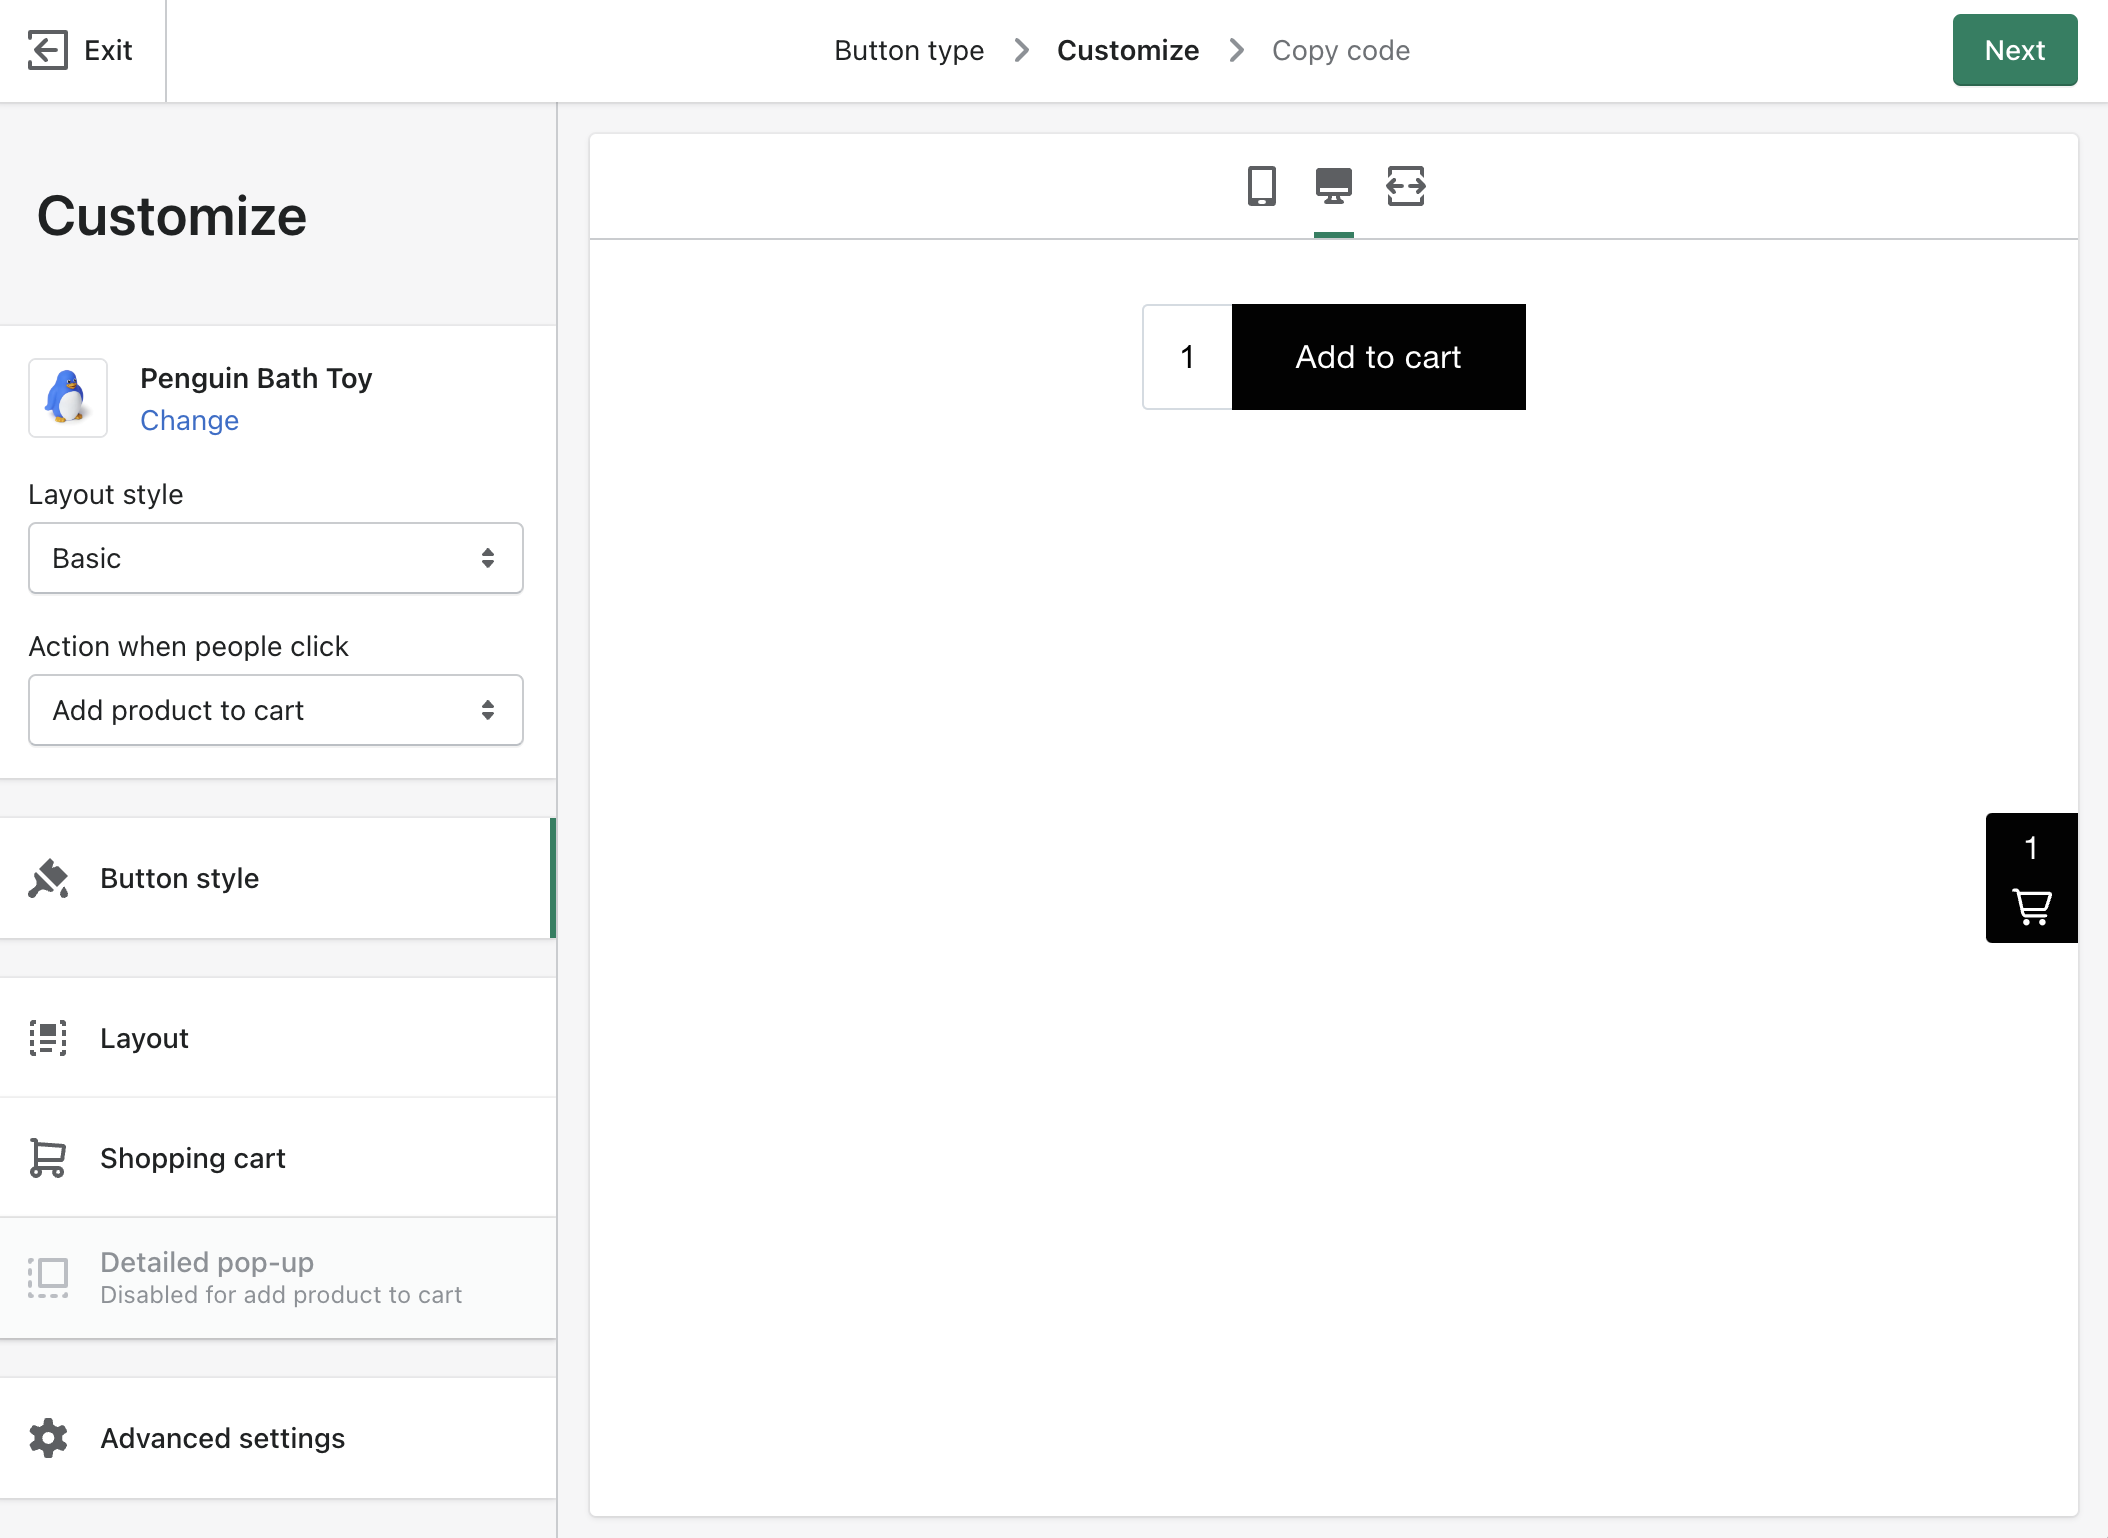
11. A Customize window will appear with many options (see above).
12. Ensure the Layout style isset to Basic. This will allow us to add the button and quantity options only and is ideal for use on a Squarespace Product Detail Page. The other layout styles (Classic and Full view) will include images and are not suitable for use on Squarespace product pages.
13. The Action when people click should be set to Add product to cart.
14. Click Button style and change the button style You can control the width of the button, round the corners and set the colours and font.
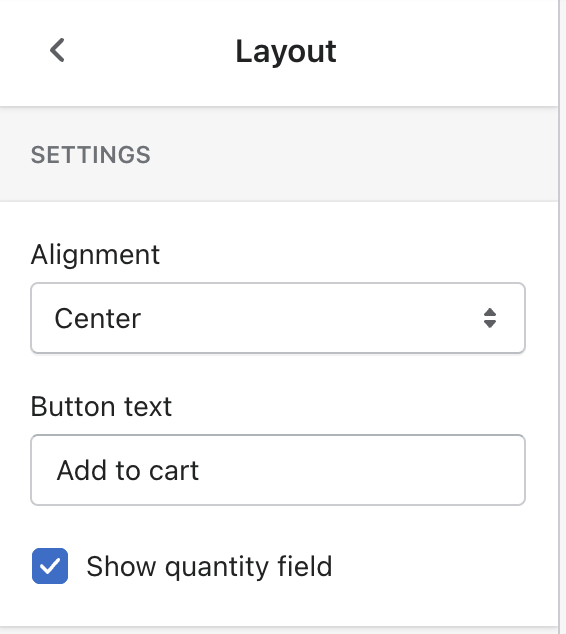
15. Click Layout and then choose whether you would like the button to be centre or left aligned on the Squarespace page. This cannot be changed later so it is important to set it now. You can also choose the caption for the button. The default caption is “Add to cart”.
16. By default, a quantity option will appear as part of the button. If you do want purchasers to buy more than one, you can go into Layout options and untick the Show quantity field option.
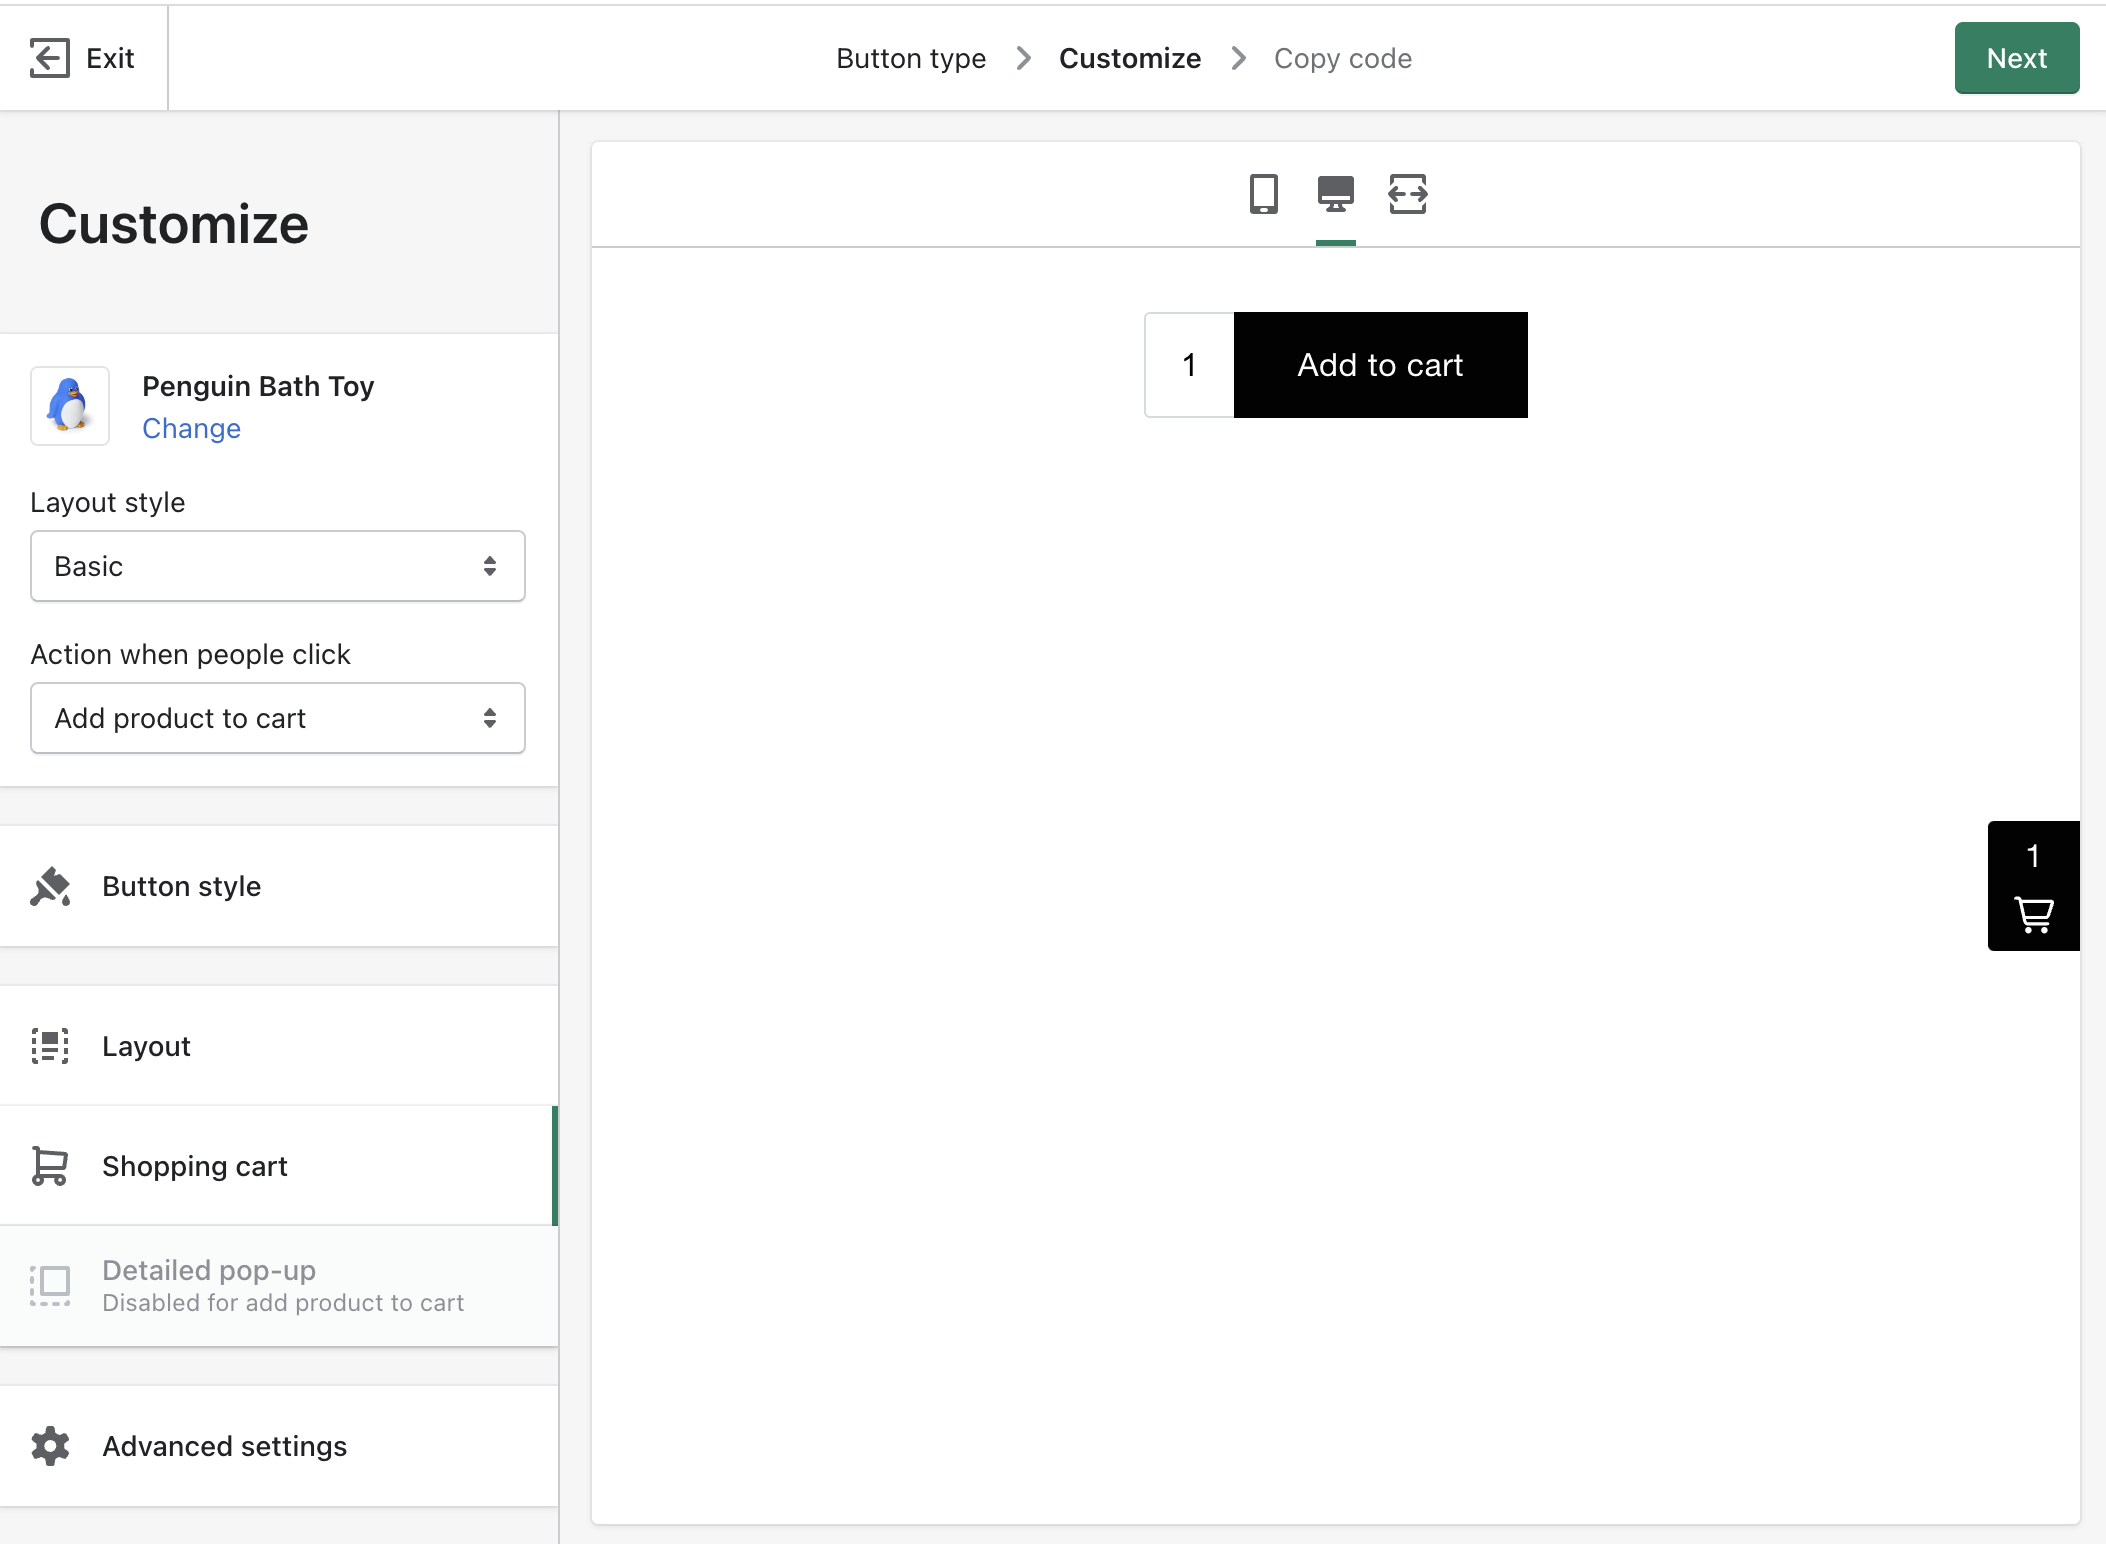
17. Click Shopping cart to customise the look of the Shopify shopping cart.
18. Click the Next button (in the top right corner).

19. You will be shown the code for the Buy Button. Click Copy code.
20. Logon to your Squarespace website and view the same product on your Products Page.
NOTE: If you are using Squarespace 7.0, follow the steps below. If you are using Squarespace 7.1, skip to step 26.
21. In your Squarespace site, go to Design > Site Styles.
22. If you are using a Brine-family template look for the tweak labelled Enable Ajax Loading and uncheck this option to disable Ajax loading. This is necessary for Shopify code to work correctly on Squarespace 7.0.
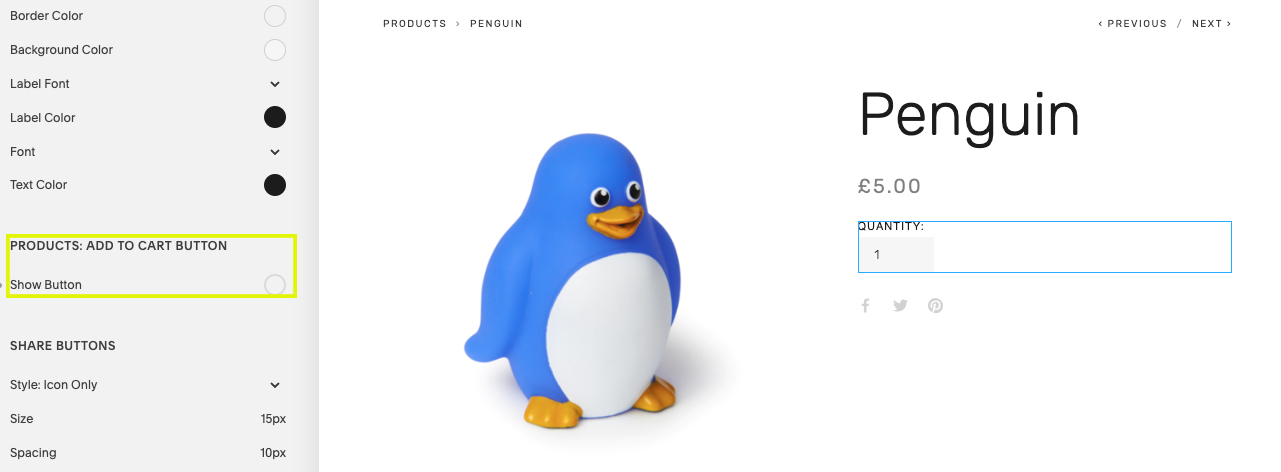
23. In the preview window, click the Add to Cart button to show the styles for the button.
24. Uncheck Show Button to hide the button.
25. Click Save to save the changes to the styles and then close the Site Styles panel.
Squarespace 7.1
If you are using Squarespace 7.1, follow the steps below. If you are using Squarespace 7.0, skip to the version 7.0 section.
V7.1 Step 26. Squarespace 7.1 doesn’t have an option to hide the Squarespace Add to Cart button or the Quantity Selector so you’ll need to add some “CSS” to hide this. To do this, locate the Custom CSS panel (this guide explains where to find this) and then add the following:
/* Hide Add to Cart Buttons if required */
.ProductItem-details .sqs-add-to-cart-button-wrapper {
  display: none!important;
}

/* Hide Quantity selector if required */
.ProductItem-details .product-quantity-input {
  display: none!important;
}
V7.1 Step 27. Save your changes.
V7.1 Step 28. View your product in the preview window. Scroll down below the product and, if you don’t already have a page section below the product, click ADD SECTION.
V7.1 Step 29. In the new page section, add a Code Block.
V7.1 Step 30. Remove the sample code from the Code Block and paste your own Shopify code into it.
V7.1 Step 31. Click APPLY and then SAVE.
V7.1 Step 32. You should now see the Shopify Buy Button on your Squarespace page, below the product image and description. This isn’t the ideal location for the button but you should be able to use the following snippet of unsupported code to reposition the Shopify Buy Button inside your Squarespace product layout. For example, just below the product title or below the price.
<!-- Shopify Buy Button positioning ------------------------------------>
<!-- You may use freely on Squarespace but do not publish -------------->
<!-- Copyright 2019-2025 Soundfocus Digital Ltd [www.sf.digital] ------->
<script>
function sfMoveShopifyButton(){
  var btn = document.querySelector("div[id^='product-component']"),
      target = document.querySelector(".product-add-to-cart");
  if (btn && target) target.appendChild(btn);
}
window.addEventListener("mercury:load", sfMoveShopifyButton);
document.addEventListener('DOMContentLoaded', sfMoveShopifyButton);
</script>
Squarespace 7.0
The following steps apply to Squarespace 7.0.
26. Edit the Product.
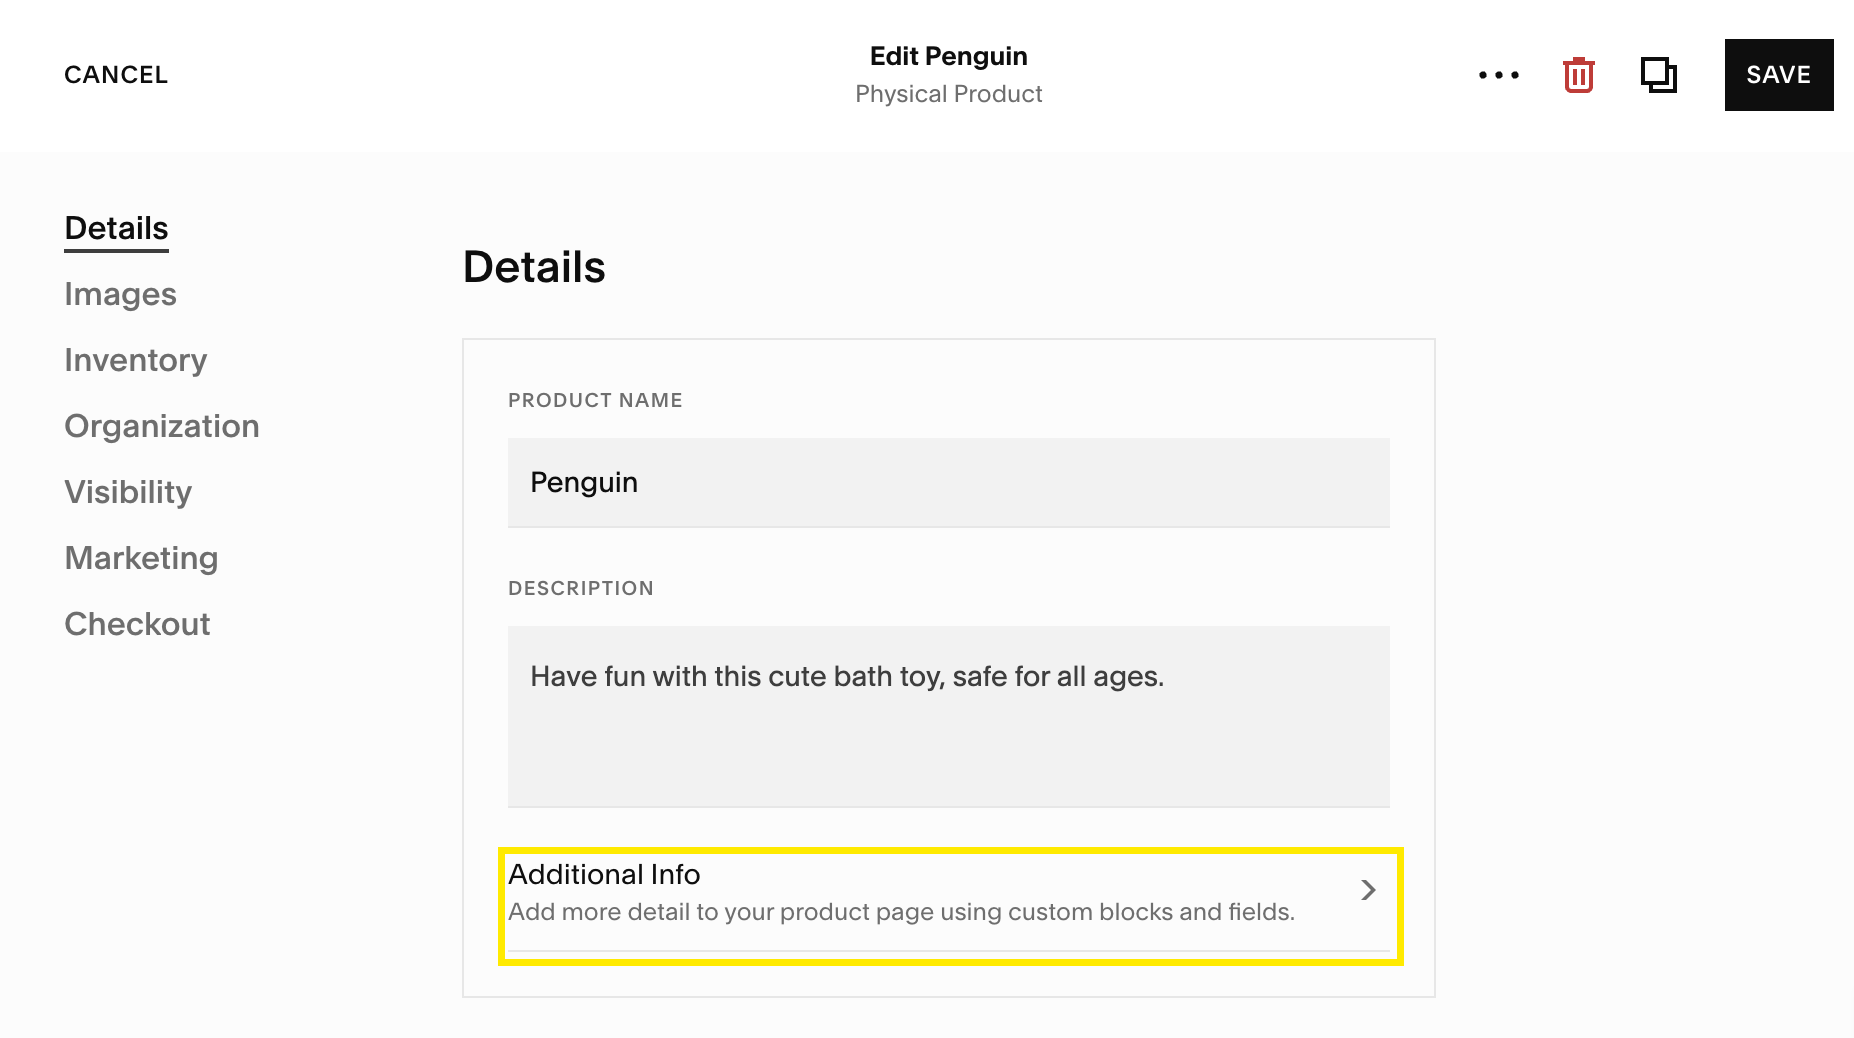
27. Click Additional Info.
28. Add a Code Block.
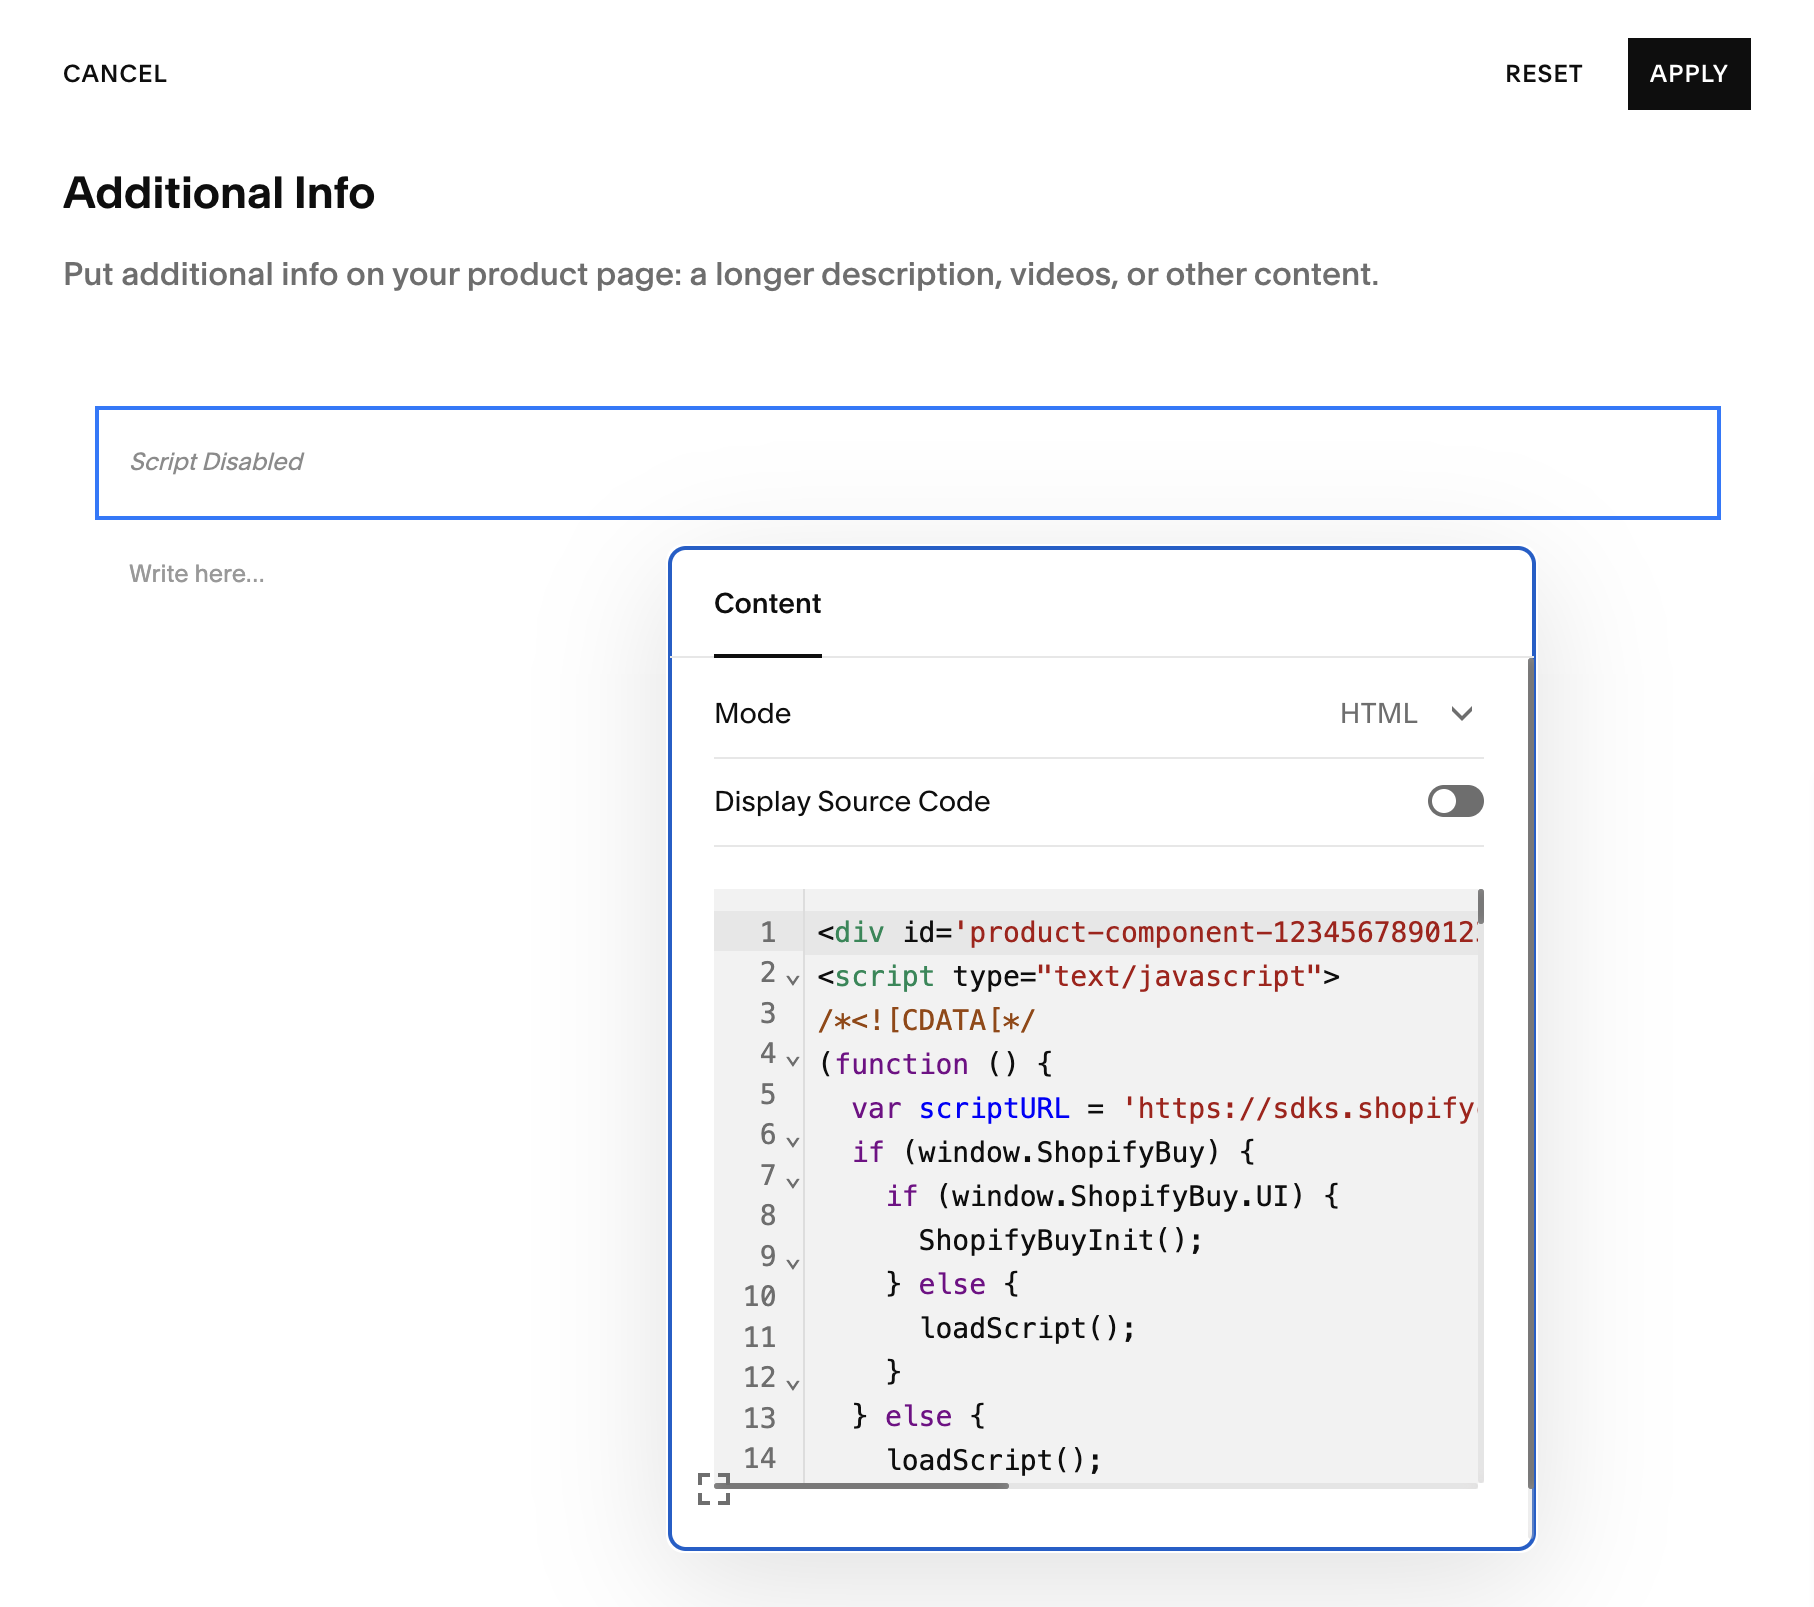
29. Remove the sample code from the Code Block and paste the Shopify code into it.
30. Click APPLY and then SAVE.
31. You should now see the Shopify Buy Button on your Squarespace page, below the product image and description. This isn’t the ideal location for the button but we sell an optional plugin that you can add to your Squarespace website that automatically places the button in a more convenient location. For example, just below the product title (as shown in the screenshot below) or below the price. The plugin also hides the quantity option as well as the Squarespace Add to Cart button on Squarespace 7.1.

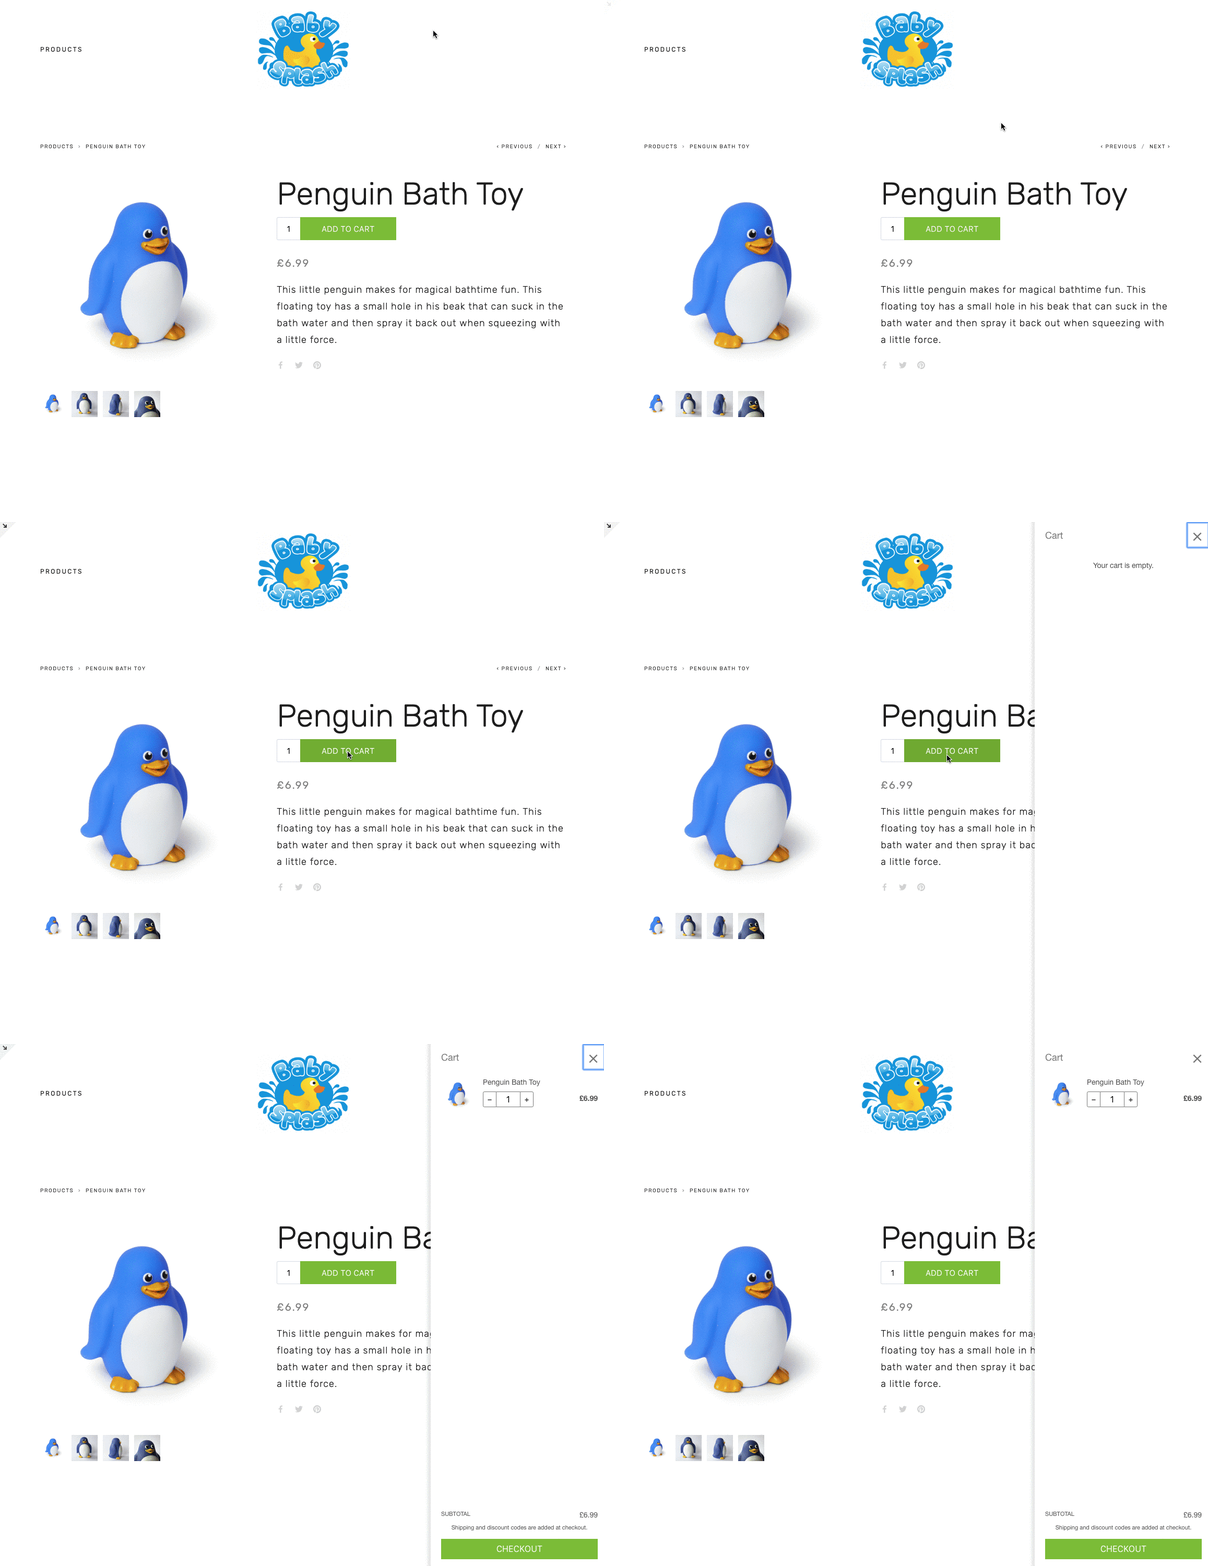
Shopify cart on Squarespace website
Both versions
Regardless of which version you are using, the next steps explain how to configure Shopify.
Click the Buy Button and the product will be added to the Shopify cart, bypassing the limited Squarespace cart. From here, customers can proceed directly to the Shopify checkout where they can pay with whatever payment method(s) you have installed in Shopify.

Adding Payment Providers
To add payment methods to Shopify, click the Settings icon (in the bottom left corner) then click on the Payment providers link.

Scroll down to Alternative payments and select the payment provider you want to use, for example Klarna.
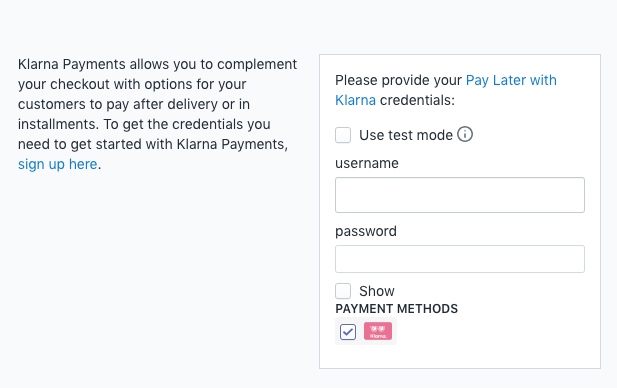
You’ll be asked to enter your login details for the payment provider you have selected. If you don’t have an account yet, click the sign up link.
I hope this article has given you an introduction to using Shopify with your Squarespace website. This guide is intended as an introductory guide so it doesn’t explain how to set up all aspects of payments, tax or shipping. Shopify have some excellent guides to help you do this yourself.
Help from a Squarespace Expert
I produced this free guide as a “self-help” guide for owners of Squarespace websites. There should be enough detail in each of the steps to allow you to add a new payment method to your store. That’s my aim, but please note that it’s almost impossible for me (or anyone else) to offer cost effective hands-on help to add Shopify Buy Buttons to your store.
If you’re building your site from scratch, I recommend that you build your site on Squarespace or Shopify. I don’t build sites that combine the features of both.