How to manually approve members in Squarespace
If you are building a Member Site on Squarespace you’ve probably already discovered that there isn’t a built-in way to manually approve who gets access! There’s currently nothing stopping them from signing up to your free Member Site plan - or even a paid plan!
I’ve been advocating for Squarespace to introduce manual approval workflows since the feature was introduced as ‘Member Area’ in November 2020. I also added this 2020 request to the Feature Requests Board when Squarespace created it in 2023. If you’re a Squarespace Circle member (a program supporting designers, creatives and developers) you can vote for this feature here.
The workaround for manually approving members
Unfortunately, the feature request has yet to be prioritised. So, while we’re still waiting for a proper solution, I’ve put together a workaround that offers a practical alternative that prevents most users from joining your Member Site unless you explicitly approve them.
Are third-party member plugins more secure?
In a word, no. Third party ‘membership’ plugins for Squarespace don’t add security to Squarespace content. Third party ‘membership’ solutions offer even less protection for Squarespace content than the built-in Member Sites feature.
Understanding the two-step process to join
Before following the steps to implement this workaround, please take a few moments to understand how the process will work.
Access to Squarespace Member Sites involves two steps:
Creating an account – Anyone can do this via the login/signup page. There isn’t any benefit in removing or restricting this option as this simply allows users to securely save payment methods, shipping addresses, shopping carts, and online order information. Although it is a prerequisite for having a member site access, creating an account doesn’t provide any access.
Joining the Member Site – This only happens when a user signs up for a specific pricing plan, to access your protected content, whether free or paid. This is the step that actually grants access to your Member Site content.
So while you can’t stop users from creating an account, you can block or control the second step, which is the one that matters for access. When you’ve implemented this workaround, the “Sign-up” button won’t be visible on your public website. Users will need to complete a form that is emailed to you instead. If you approve their application, you’ll manually email them a link to a password-protected page where they can create their account and sign-up to join the member site.
Step-by-step guide to manual member approval
1. Set up a member site with a pricing plan
Create your Member Site and add a pricing plan. This can be a free plan or a paid plan, depending on your needs. For example, a club or society may charge a small membership fee as part of the join process.
2. Hide the “Sign up” button from the paywall page
Once your Member Site and pricing plan are created:
2.1 Go to the Pages panel.
2.2 Scroll down to the Member Sites section and click the name of your member site.
2.3 Click the Paywall button.
2.4 Under Featured Pricing Plans, click the eye icon beside your plan to hide the pricing plan. The icon should change to show that it is hidden.
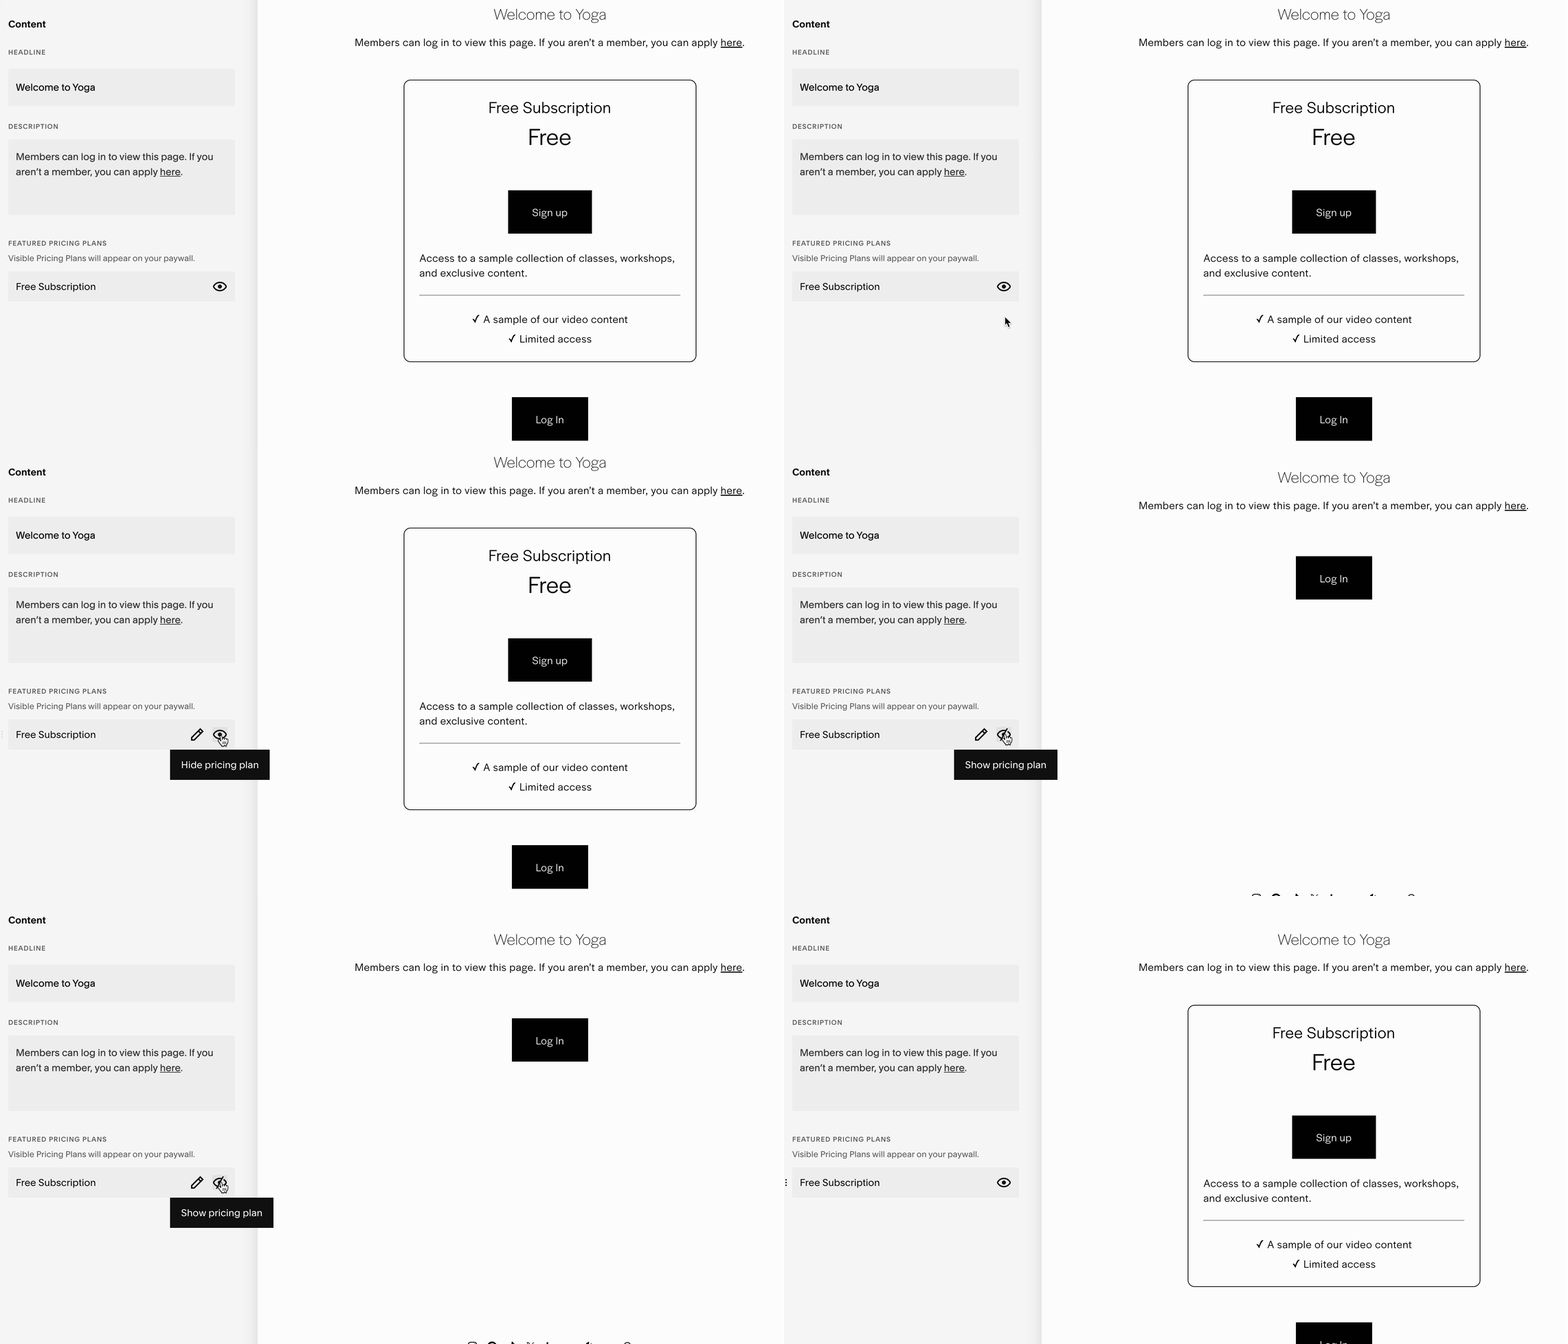
As you’ll see in the image above, hiding the pricing plan hides the associated “Sign up” or "Join" button from the page shown to unauthorised users. This prevents anyone from signing up directly. There is no need to remove the ‘Account’ link from the site header because, as explained above, this only allows some to create an account, but that account will not have access to the member site.
3. Add a public application form
To allow people to sign up for access to your member site, you need a page where they can contact you to request access.
3.1 Create a new page (in the NOT LINKED section of the Pages panel). I called mine “Apply to join”.
3.2 Add a Form Block to the page.
3.3 Add fields to the form so you can collect information from potential members. For example, this may include their name, email address, reason for joining and so on. This form becomes your vetting process. Only approved applicants will receive further instructions.
4. Create a Password-Protected Sign-Up Page
The next step is to create a password-protected page that will contain the real “Sign up” form where they create their account and join your member site.
4.1 Whilst you are still in the NOT LINKED section of the Pages panel, create a new page. I called mine “Member Sign Up”.
4.2 Click the gear icon beside the new page to open the Page Settings.
4.3 Under General, scroll down to the Password box and set a long, complex password that you will share with approved members. Without this password, visitors to your site will not be able to join the member site.
4.4. Under SEO, enable Hide Page from Search Results. so the page doesn’t appear in search engine results.
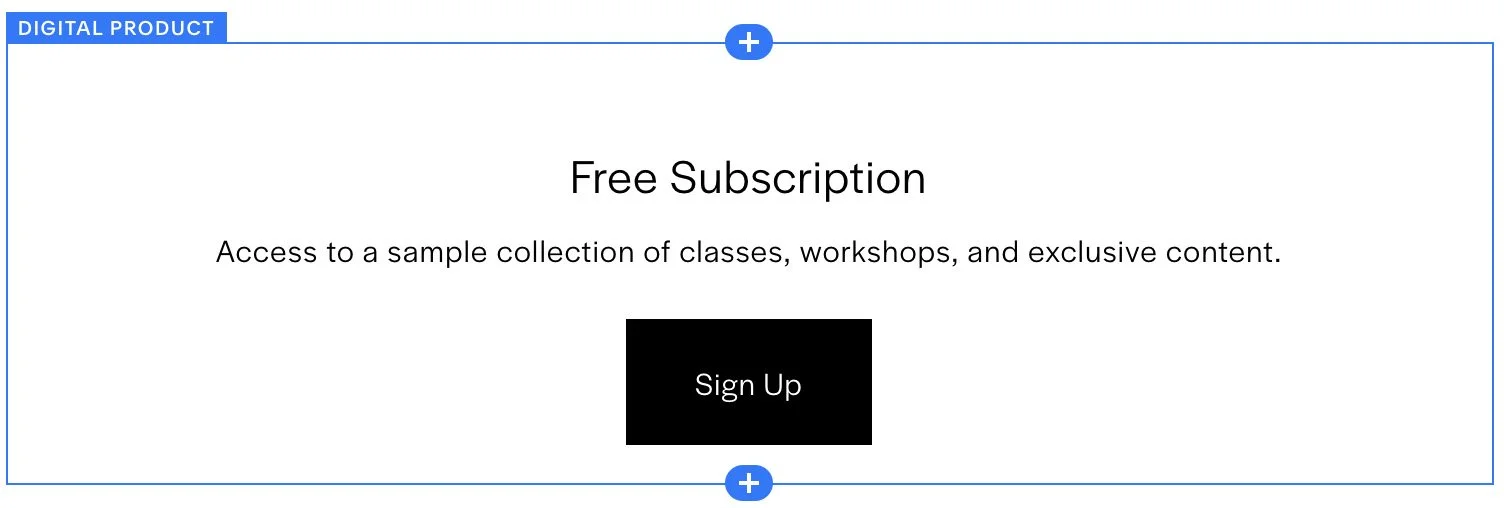
4.5 Edit the new page, and add Digital Products Block to this page that displays the relevant pricing plan and “Sign Up” button. Only users who know the page address and password will be able to access it and sign up.
4.6 Change the Digital Products Block settings to meet your needs. For example, if the pricing plan is ‘free’ you may want to toggle the price to off.
4.7 Save and close the page.
5. Approve and Invite Members
You have now completed the settings. When you receive a form submission from someone you’d like to approve:
Send them the link to your private signup page.
Include the password.
Once they complete the sign-up, they’ll gain access to your Member Site just like any other subscriber.
Summary
This approach gives you a functional way to:
Control who joins your Member Site
Vet applicants in advance
Avoid unwanted sign-ups to free or low-cost plans
It isn’t a security feature but, for many businesses, it’s a workable and practical solution.